
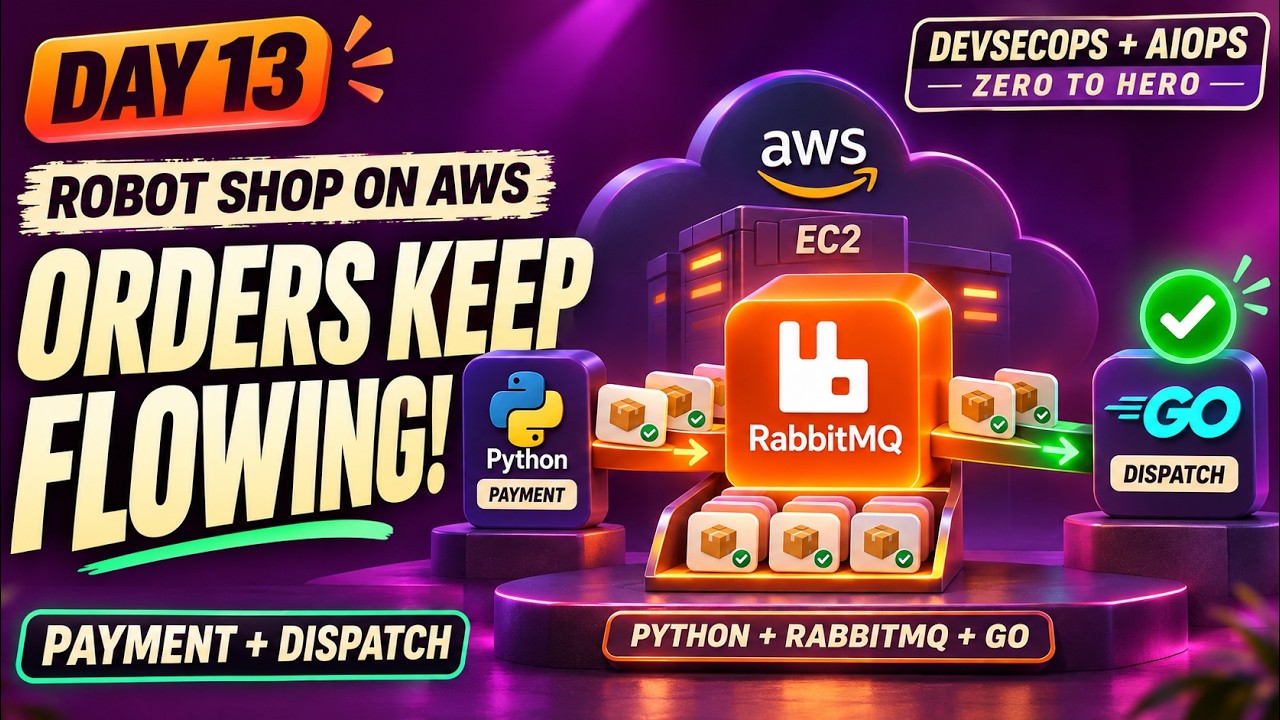
This is Part 3, the final part of the series on deploying the Robot Shop microservices app on AWS EC2. In Part 1 we deployed MongoDB, Catalogue and the Nginx frontend. In Part 2 we added Redis, User, Cart, MySQL and Shipping, and got shipping quotes working.
Now we finish the order flow: RabbitMQ, the Payment service (Python) and the Dispatch service (Go). Along the way, checkout breaks in a way that teaches you how microservices really depend on each other, and at the end we’ll watch orders pile up in a queue and drain away.
Where checkout fails, and why
With everything from Parts 1 and 2 running, add a robot to the cart, go to checkout, choose a city and click to confirm shipping. It fails. In the browser’s DevTools Network tab, the failing request is:
POST /api/shipping/confirm → errorConfirming shipping isn’t just a Shipping job. Here’s what actually happens when an order goes through:
- Shipping calls Cart to add the shipping cost to your cart.
- Payment reads the cart from Cart and checks the customer with User.
- Payment publishes the order to RabbitMQ.
- Dispatch consumes orders from the queue and processes them.
In a monolith, a missing piece is a compile error. In microservices, it’s a network call to something that isn’t there. So the first job is to deploy the missing services, then follow the errors.
New example private IPs, continuing from earlier parts: RabbitMQ 10.0.1.90, Payment 10.0.1.100, Dispatch 10.0.1.110. Security groups: RabbitMQ port 5672 only from Payment and Dispatch; Payment 8080 from the web server; Cart and User 8080 also from Payment and Shipping.
Step 1: RabbitMQ
RabbitMQ is the message queue between Payment and Dispatch. Payment doesn’t wait for an order to be dispatched. It drops a message in the queue and immediately tells the customer “order placed”. Launch an Ubuntu instance:
sudo apt-get update
sudo apt-get install -y rabbitmq-server
sudo systemctl enable --now rabbitmq-server
sudo rabbitmqctl status
RabbitMQ comes with a guest user, but guest is only allowed to connect from localhost, so other servers can’t use it. Create a dedicated user and give it permissions on the default virtual host (/):
sudo rabbitmqctl add_user robot 'Choose-A-Strong-Password'
sudo rabbitmqctl set_permissions -p / robot ".*" ".*" ".*"
sudo rabbitmqctl list_users
The three ".*" patterns are configure, write and read permissions, matching every queue and exchange. That’s fine for this app. In a shared broker you’d scope them to the specific queues a user needs.
RabbitMQ listens on port 5672 on all interfaces by default, so there’s no bind address to change this time. Just make sure the security group only lets the Payment and Dispatch servers in.
Step 2: Payment service (Python + uWSGI)
Payment is a Python Flask app served by uWSGI. It needs to know where RabbitMQ, Cart and User are. Check the variables it reads:
git clone https://github.com/instana/robot-shop.git
grep -rn "getenv\|environ" robot-shop/payment/*.py
Install Python, the venv module, and the build tools uWSGI needs. uWSGI is compiled during pip install, which fails without python3-dev and build-essential:
sudo apt-get install -y python3 python3-venv python3-dev build-essentialSet up the code with its own virtual environment, so its packages never clash with the system’s Python:
sudo useradd --system --no-create-home --shell /usr/sbin/nologin payment
sudo mkdir -p /opt/payment
sudo cp -r robot-shop/payment/* /opt/payment/
cd /opt/payment
sudo python3 -m venv venv
sudo ./venv/bin/pip install -r requirements.txt
sudo chown -R payment:payment /opt/payment
Create the environment file. Use the exact variable names you found with the grep above:
sudo nano /opt/payment/payment.envAMQP_HOST=10.0.1.90
AMQP_USER=robot
AMQP_PASS=Choose-A-Strong-Password
CART_HOST=10.0.1.60
USER_HOST=10.0.1.50systemd unit, running uWSGI from the virtual environment with the project’s own payment.ini:
sudo nano /etc/systemd/system/payment.service[Unit]
Description=Robot Shop Payment Service
After=network.target
[Service]
User=payment
WorkingDirectory=/opt/payment
EnvironmentFile=/opt/payment/payment.env
ExecStart=/opt/payment/venv/bin/uwsgi --ini payment.ini
Restart=always
RestartSec=5
[Install]
WantedBy=multi-user.targetsudo chmod 600 /opt/payment/payment.env
sudo systemctl daemon-reload
sudo systemctl enable --now payment
journalctl -u payment -fThe env file holds the RabbitMQ password, so chmod 600 keeps other users on the server from reading it.
On the web server, add the Nginx route next to the others:
location /api/payment/ {
    proxy_pass http://10.0.1.100:8080/;
    proxy_set_header Host $host;
    proxy_set_header X-Forwarded-For $proxy_add_x_forwarded_for;
}
sudo nginx -t && sudo systemctl reload nginxStep 3: The Shipping service was missing a variable
Payment is up, but /api/shipping/confirm still fails. Time to read the Shipping logs:
journalctl -u shipping -n 100 --no-pagerThe errors show Shipping trying to reach Cart at a hostname that doesn’t exist. Shipping calls Cart when you confirm, and it finds Cart through a CART_ENDPOINT variable that we never set in Part 2. Without it, Shipping falls back to the default hostname cart, which only works inside Docker networks, not on EC2.
Add it to the Shipping unit file:
sudo nano /etc/systemd/system/shipping.serviceEnvironment=DB_HOST=10.0.1.70
Environment=CART_ENDPOINT=10.0.1.60:8080sudo systemctl daemon-reload
sudo systemctl restart shippingRetry checkout. Shipping confirmation now succeeds, and the order moves on to the payment step.
The lesson: when a service “works” on its own but fails as part of a flow, look for a dependency it only uses on that code path. Its health check can pass while a call it rarely makes is pointing nowhere. journalctl on the service that returns the error almost always names the host it couldn’t reach.
Step 4: Dispatch service (Go)
Dispatch reads orders from RabbitMQ and processes them. It’s written in Go, so it’s built into a single binary. Launch an instance and install Go:
sudo apt-get update
sudo apt-get install -y golang-go git
go version
Build the binary from the source:
git clone https://github.com/instana/robot-shop.git
cd robot-shop/dispatch
ls                               # check whether go.mod already exists
go mod init dispatch             # only if there is no go.mod
go mod tidy                      # downloads the dependencies
go build -o dispatch .
Robot Shop’s Dispatch predates Go modules, which is why you may need go mod init before it builds with a modern Go toolchain.
Install it with its own system user and systemd unit:
sudo useradd --system --no-create-home --shell /usr/sbin/nologin dispatch
sudo mkdir -p /opt/dispatch
sudo cp dispatch /opt/dispatch/
sudo chown -R dispatch:dispatch /opt/dispatch
sudo nano /etc/systemd/system/dispatch.service
[Unit]
Description=Robot Shop Dispatch Service
After=network.target
[Service]
User=dispatch
Environment=AMQP_HOST=10.0.1.90
Environment=AMQP_USER=robot
Environment=AMQP_PASS=Choose-A-Strong-Password
ExecStart=/opt/dispatch/dispatch
Restart=always
RestartSec=5
[Install]
WantedBy=multi-user.targetsudo systemctl daemon-reload
sudo systemctl enable --now dispatch
journalctl -u dispatch -fAs with Payment, check the source for the exact names of the RabbitMQ credential variables and match them.
Step 5: Watch the queue work
This is the clearest demonstration of why message queues exist. First, stop Dispatch:
sudo systemctl stop dispatch # on the dispatch serverNow place two or three orders on the website. Checkout still succeeds, because Payment only needs RabbitMQ to accept the message, not Dispatch to process it. On the RabbitMQ server:
sudo rabbitmqctl list_queues name messages consumersname messages consumers
orders 3 0Three orders are waiting, and nothing is consuming them. Now start Dispatch again:
sudo systemctl start dispatchRun list_queues again a few seconds later:
name     messages   consumers
orders   0          1
Dispatch connected, consumed the backlog, and the queue is back to zero. No order was lost while Dispatch was down. That’s the whole point of asynchronous processing: a slow or failed downstream service doesn’t break checkout for customers, and work resumes when it comes back.
The complete Robot Shop architecture
Browser → Web (Nginx, yourdomain.com)
            ├── /api/catalogue/ → Catalogue (Node.js) → MongoDB
            ├── /api/user/      → User (Node.js)      → MongoDB, Redis
            ├── /api/cart/      → Cart (Node.js)      → Redis, Catalogue
            ├── /api/shipping/  → Shipping (Java)     → MySQL, Cart
            └── /api/payment/   → Payment (Python)    → Cart, User → RabbitMQ
                                                                       ↓
                                                         Dispatch (Go) consumes orders
Eleven EC2 instances, five programming languages, four kinds of data store, every one configured, secured and connected by hand.
What this series taught (and what to try next)
- Read the code to find dependencies. A service’s environment variables are its dependency list.
- Debug one hop at a time: browser DevTools → Nginx → service logs (
journalctl) →ss -tlnpon the target →nc -zv/curlfrom the caller. - Most failures are configuration, not code: a server bound to localhost, a blocked port, a wrong or missing host variable.
- Least privilege everywhere: a system user per service, database users limited to one host, ports open only to the callers.
Doing this by hand once is exactly why tools like Docker Compose and Kubernetes exist. They automate the service discovery, restarts and networking you just configured manually. Natural next steps are containerising each service, then running the whole shop on Kubernetes, adding monitoring, and using managed services (RDS, ElastiCache, Amazon MQ) instead of self-run databases.
Clean up your AWS account
You’re running around eleven instances. When you finish, terminate them (not just stop) if you won’t reuse them, release any Elastic IPs, and delete leftover EBS volumes and snapshots. Check the EC2 console in your region one last time so nothing keeps billing quietly.
The full series
- Part 1: MongoDB, Catalogue & Nginx Frontend
- Part 2: Redis, User, Cart, MySQL & Shipping
- Part 3: RabbitMQ, Payment & Dispatch (you’re here)
Watch Part 3, including all the troubleshooting, on my YouTube channel, Madhukar Reddy (@awsandevops).

Related articles
 AWS
Deploy Robot Shop on AWS EC2 – Part 2: Redis, User, Cart, MySQL & Shipping (Fixing Real Connection Failures)
Part 2 of the Robot Shop series: deploy Redis, the User and Cart services, MySQL and the Java Shipping service on EC2, and troubleshoot the real connection failures along the way.
 AWS
Deploy Robot Shop Microservices on AWS EC2 – Part 1: MongoDB, Catalogue & Nginx Frontend
Part 1 of the Robot Shop series: understand microservices, then deploy MongoDB, the Node.js Catalogue service with systemd, and the Nginx web frontend on separate EC2 instances.
 AWS
Build & Deploy a Full-Stack 3-Tier App on AWS EC2 (React, Node.js, MySQL, Nginx)
Deploy a React frontend, Node.js API and MySQL database on three EC2 instances, connect them over private IPs with tight security groups, then add Nginx, a custom domain and free HTTPS.