
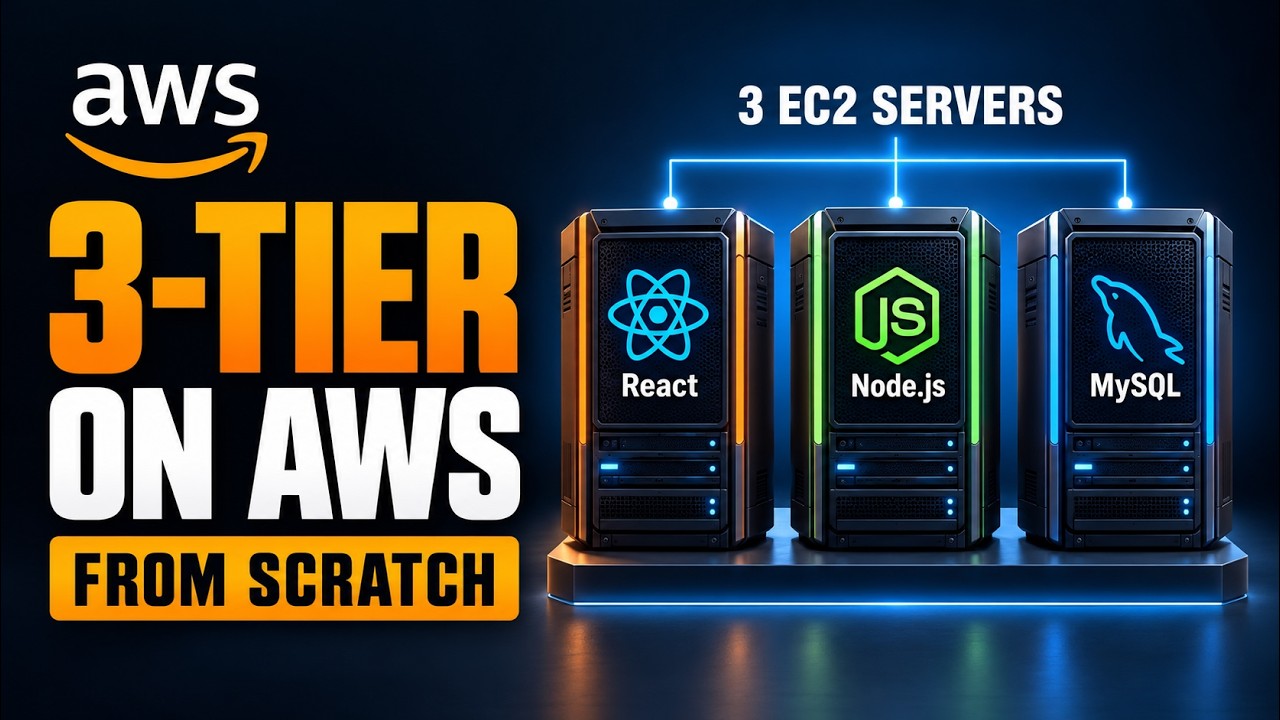
Most beginner tutorials deploy everything on one server: frontend, backend and database all on the same machine. It works, but it’s not how real applications run, and it hides the parts that actually break in production: networking between servers, firewall rules, private IPs and reverse proxies.
In this guide we’ll deploy a proper three-tier application on AWS: a React frontend, a Node.js API and a MySQL database, each on its own EC2 instance. Then we’ll put a custom domain and free HTTPS in front of it. The app is a small shop called ShopLight, but the steps work for any React + Node + MySQL project.
What “three-tier” means
A three-tier architecture splits an application into three layers, each with one job:
- Presentation tier (frontend): what the user sees. Here, a React app served as static files by Nginx.
- Application tier (backend): the business logic. A Node.js/Express API that handles requests and talks to the database.
- Data tier (database): where data lives. MySQL.
Splitting them means you can scale, secure and update each layer separately. The database can sit somewhere the internet can’t reach at all, and only the frontend needs to be public.
The request flow we’re building:
Browser → https://yourdomain.com
        → Frontend EC2 (Nginx)
              ├── /        → React static files
              └── /api/... → Backend EC2 :5000 (Node.js)  [private IP]
                                   → Database EC2 :3306 (MySQL)  [private IP]
Step 1: Launch three EC2 instances
Create three Ubuntu instances in the same VPC (a t2.micro/t3.micro is enough for a demo). Name them clearly: db, backend and frontend. Same VPC matters, because the tiers will talk to each other over private IPs, which never leave AWS’s network.
Note down each instance’s private IP. In this post I’ll use these as examples:
- Database:
10.0.1.10 - Backend:
10.0.1.20 - Frontend:
10.0.1.30(plus a public IP)
Security groups: the part people get wrong
Give each tier its own security group and only open what the next tier needs:
- frontend-sg: 80 and 443 from anywhere (0.0.0.0/0), 22 from your IP
- backend-sg: 5000 only from frontend-sg, 22 from your IP
- db-sg: 3306 only from backend-sg, 22 from your IP
Using a security group as the source, instead of an IP, means the rule keeps working even if instances are replaced. And the database port is never open to the internet. That single rule prevents a lot of real-world breaches.
Step 2: Database tier (MySQL)
SSH into the db instance and install MySQL:
sudo apt update
sudo apt install -y mysql-server
sudo systemctl enable --now mysql
Create the database and an application user. Don’t let the app connect as root:
sudo mysqlCREATE DATABASE shoplight;
CREATE USER 'shoplight'@'10.0.1.20' IDENTIFIED BY 'Use-A-Strong-Password-1!';
GRANT ALL PRIVILEGES ON shoplight.* TO 'shoplight'@'10.0.1.20';
FLUSH PRIVILEGES;
EXIT;Notice the host part, 'shoplight'@'10.0.1.20'. That user can only log in from the backend server’s private IP. You’ll often see '%' (any host) in tutorials. It works, but it’s much less safe.
Load the schema and sample data from the project (adjust the file names to your repo):
mysql -u root -p shoplight < schema.sql
mysql -u root -p shoplight < seed.sql
Allow connections from other servers
By default MySQL on Ubuntu only listens on 127.0.0.1, so the backend can’t reach it. Edit the config:
sudo nano /etc/mysql/mysql.conf.d/mysqld.cnfbind-address = 0.0.0.0sudo systemctl restart mysql
sudo ss -tlnp | grep 3306 # should now show 0.0.0.0:33060.0.0.0 means “listen on all interfaces”. That’s safe here only because the security group lets nothing but the backend reach port 3306. For a tighter setup, bind to the DB’s private IP instead.
Step 3: Backend tier (Node.js + systemd)
On the backend instance, install Node.js. The NodeSource repository gives you a current LTS version, which Ubuntu’s default package often doesn’t:
curl -fsSL https://deb.nodesource.com/setup_20.x | sudo -E bash -
sudo apt install -y nodejs git mysql-client
node -v && npm -v
Before deploying anything, test the database connection from this server. If this fails, the app will fail too, and this error message is much clearer:
mysql -h 10.0.1.10 -u shoplight -p shoplightNow clone the code and install dependencies:
git clone https://github.com/<your-repo>/shoplight.git
cd shoplight/backend
npm install --omit=dev
Create the .env file with the database’s private IP:
PORT=5000
DB_HOST=10.0.1.10
DB_USER=shoplight
DB_PASSWORD=Use-A-Strong-Password-1!
DB_NAME=shoplight
Never commit this file to Git. Lock its permissions with chmod 600 .env.
Keep the API running with systemd
Running node server.js in your SSH session works until you close the terminal. To keep the API running in the background, restart it if it crashes, and start it on boot, create a systemd service:
sudo nano /etc/systemd/system/app.service[Unit]
Description=ShopLight Node.js API
After=network.target
[Service]
User=ubuntu
WorkingDirectory=/home/ubuntu/shoplight/backend
ExecStart=/usr/bin/node server.js
Restart=always
RestartSec=5
Environment=NODE_ENV=production
[Install]
WantedBy=multi-user.targetsudo systemctl daemon-reload
sudo systemctl enable --now app
sudo systemctl status app
journalctl -u app -f # live logsCheck that the API answers locally:
curl http://localhost:5000/api/productsUse whatever your app’s entry file and routes are called. If ExecStart points at the wrong file, systemctl status app will show it failing and restarting.
Step 4: Frontend tier (React + Nginx)
On the frontend instance, install Node.js the same way, clone the code and build the production bundle:
cd shoplight/frontend
npm install
npm run build
This produces a build/ folder (or dist/ with Vite) of plain HTML, CSS and JavaScript. No Node process is needed to serve it. Nginx does that.
One important detail: the React app should call the API with a relative path like /api/products, not http://10.0.1.20:5000. The user’s browser can’t reach a private IP. Nginx will forward /api for it.
sudo apt install -y nginx
sudo rm -rf /var/www/html/*
sudo cp -r build/* /var/www/html/
Nginx: static files plus reverse proxy
sudo nano /etc/nginx/sites-available/defaultserver {
listen 80 default_server;
server_name _;
root /var/www/html;
index index.html;
# React app: send unknown paths to index.html (client-side routing)
location / {
try_files $uri $uri/ /index.html;
}
# API: forward to the backend over the private network
location /api/ {
proxy_pass http://10.0.1.20:5000;
proxy_set_header Host $host;
proxy_set_header X-Real-IP $remote_addr;
proxy_set_header X-Forwarded-For $proxy_add_x_forwarded_for;
proxy_set_header X-Forwarded-Proto $scheme;
}
}sudo nginx -t
sudo systemctl reload nginxBecause proxy_pass has no path after the port, Nginx forwards the full URI, so /api/products arrives at the backend as /api/products. If your backend routes don’t start with /api, write proxy_pass http://10.0.1.20:5000/; with a trailing slash to strip the prefix.
Open the frontend’s public IP in the browser. The products should load from MySQL, through Node, through Nginx.
How the app talks: CRUD and HTTP methods
Every action in the shop maps to an HTTP method on the API:
- Create a product →
POST /api/products - Read products →
GET /api/products - Update a product →
PUT /api/products/42 - Delete a product →
DELETE /api/products/42
Open the browser’s DevTools Network tab while you use the app and you’ll see each of these requests, with its status code.
HTTP status codes you’ll see while troubleshooting
- 2xx: success.
200 OK,201 Createdafter a POST. - 3xx: redirection.
301when HTTP redirects to HTTPS. - 4xx: the request is the problem.
404 Not Found(wrong URL or route),403 Forbidden(no permission, often file permissions in Nginx),400 Bad Request(invalid data). - 5xx: the server is the problem.
500is an error inside your app.502 Bad Gatewaymeans Nginx couldn’t get a response from the backend.
Fixing a 502 Bad Gateway
This is the most common error in a three-tier setup, and it’s almost always one of these:
- The backend isn’t running:
sudo systemctl status appon the backend. - Wrong IP or port in
proxy_pass. - backend-sg doesn’t allow port 5000 from the frontend. Test from the frontend server:
curl http://10.0.1.20:5000/api/products. - The backend can’t reach MySQL, so it crashes on startup. Check
journalctl -u app.
Work from the frontend inward: Nginx error log (/var/log/nginx/error.log), then the backend, then the database. The log at each tier tells you whether the problem is in front of it or behind it.
Step 5: Custom domain with Route 53
Only the frontend needs a public address. Attach an Elastic IP to the frontend instance so the IP doesn’t change on restart, then in your Route 53 hosted zone create:
- An A record for the root domain → the frontend’s Elastic IP
- An A record for
www→ the same IP
If you haven’t moved your domain’s DNS to Route 53 yet, I walk through that, and how DNS resolution works, in DNS Explained: Route 53, Let’s Encrypt & Nginx.
Step 6: Free HTTPS with Certbot
On the frontend instance, install Certbot using Snap, which is the method Certbot recommends:
sudo snap install --classic certbot
sudo ln -s /snap/bin/certbot /usr/bin/certbot
First update server_name _; in the Nginx config to your real domain, so Certbot knows which block to edit:
server_name yourdomain.com www.yourdomain.com;Then run:
sudo nginx -t && sudo systemctl reload nginx
sudo certbot --nginx -d yourdomain.com -d www.yourdomain.com
Certbot proves you own the domain over HTTP, gets a Let’s Encrypt certificate, adds the SSL settings to your Nginx config, and sets up the HTTP → HTTPS redirect for you. The Snap package also installs a timer that renews the certificate automatically. Confirm it works:
sudo certbot renew --dry-runOpen https://yourdomain.com, and your three-tier app is live with the padlock.
What to improve next
This setup is a solid foundation, and it’s exactly how the pieces connect in production. To take it further:
- Move the backend and database into private subnets with no public IPs at all, and reach them through a bastion host or SSM Session Manager.
- Replace the database EC2 with Amazon RDS for automated backups and Multi-AZ failover.
- Put an Application Load Balancer in front with multiple frontend and backend instances. See Deploy WordPress on AWS EC2 with ALB, Route 53 & SSL.
- Containerise each tier and automate deployments with CI/CD, as in my end-to-end DevOps project.
- Run the Node app as a dedicated non-login user rather than
ubuntu. I explain why in Linux User Setup & Non-Interactive Shell Explained.
Wrapping up
You’ve deployed a React frontend, Node.js API and MySQL database on three EC2 instances that talk over private IPs, locked down with security groups, served through Nginx as a reverse proxy, and published on your own domain with HTTPS. If you can explain each hop in that request flow, and debug a 502 when one of them breaks, you understand more about real deployments than most beginner tutorials teach.
Watch the complete build, step by step, on my YouTube channel, Madhukar Reddy (@awsandevops).

Related articles
 AWS
Deploy Robot Shop on AWS EC2 – Part 3: RabbitMQ, Payment & Dispatch (Real-World Troubleshooting)
The final part of the Robot Shop series: deploy RabbitMQ, the Python Payment service and the Go Dispatch service, fix a missing Shipping variable, and watch orders queue and drain in RabbitMQ.
 AWS
Deploy Robot Shop on AWS EC2 – Part 2: Redis, User, Cart, MySQL & Shipping (Fixing Real Connection Failures)
Part 2 of the Robot Shop series: deploy Redis, the User and Cart services, MySQL and the Java Shipping service on EC2, and troubleshoot the real connection failures along the way.
 AWS
Deploy Robot Shop Microservices on AWS EC2 – Part 1: MongoDB, Catalogue & Nginx Frontend
Part 1 of the Robot Shop series: understand microservices, then deploy MongoDB, the Node.js Catalogue service with systemd, and the Nginx web frontend on separate EC2 instances.