
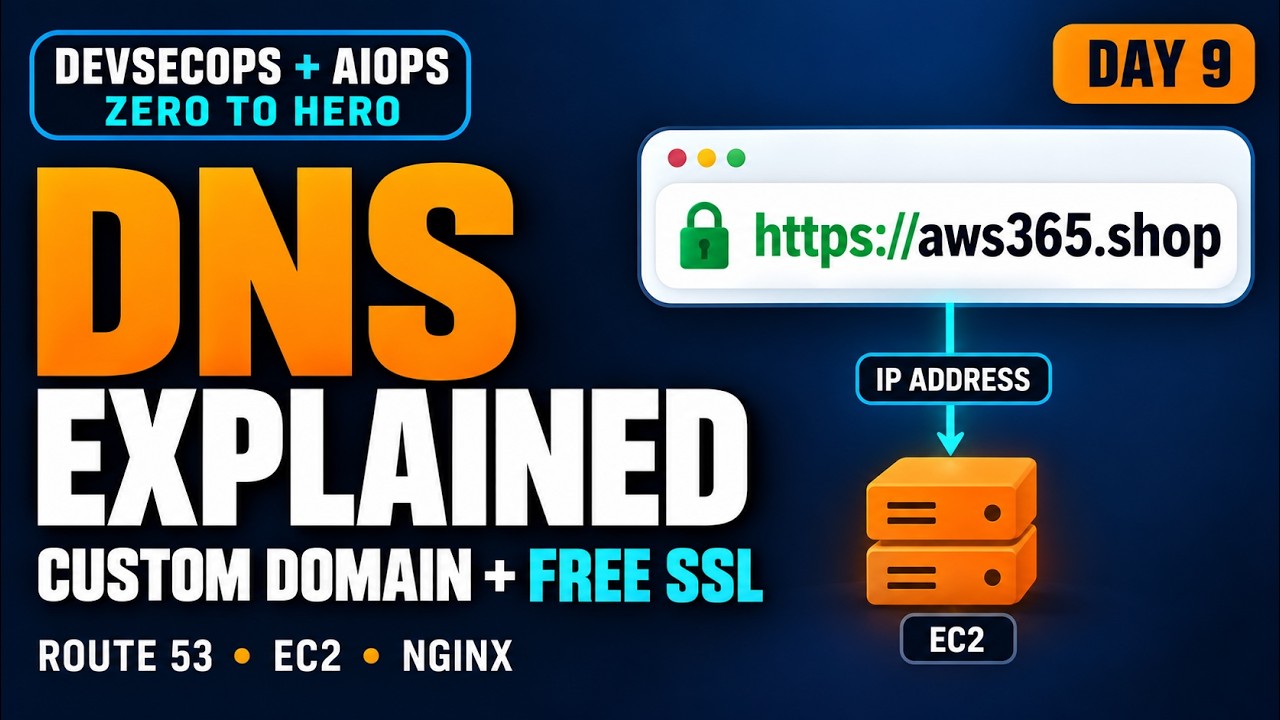
Every time I deploy an app for a student or a client, the part that confuses people most isn’t Docker or the server. It’s the last step: getting https://yourdomain.com to actually open the app, with the padlock showing.
So in this post I’m doing the whole thing end to end. How DNS works (properly, not the one-line version), buying a domain, moving DNS to Route 53, getting a free wildcard SSL certificate from Let’s Encrypt with Certbot, and configuring Nginx to serve HTTPS. Same steps I follow in the video.
Why DNS exists at all
Computers talk to each other using IP addresses like 13.233.45.120. Humans can’t remember those, and IPs change anyway when you replace a server. DNS is the system that turns a name like aws365.shop into the IP of the machine that should answer.
That’s really it. Everything else in this post is about how that lookup happens and how you control the answer.
What happens when you type a domain in the browser
When you open www.aws365.shop for the first time, the lookup goes roughly like this:
- Browser and OS cache. If you visited recently, the answer is already cached and nothing else happens.
- Recursive resolver. If not, your machine asks a resolver. Usually that’s your ISP’s, or something like 8.8.8.8 or 1.1.1.1. The resolver does the legwork for you.
- Root servers. The resolver asks a root server, “who handles
.com?” The root zone is managed by IANA (part of ICANN), and there are 13 named root server identities, run by different organisations, with hundreds of copies spread across the world. - TLD servers. The
.comregistry’s servers reply with “here are the name servers foraws365.shop“. These are the NS records your registrar set when you bought the domain. - Authoritative name servers. Finally, the resolver asks those name servers for the actual record, gets the IP, caches it, and hands it to your browser.
You can watch this whole chain yourself:
dig +trace www.aws365.shopThe important point for us: step 5 is the part you control. Whoever hosts your authoritative name servers decides what IP your domain points to. Later we’ll make that Route 53.
The DNS records you’ll actually use
- A: name to IPv4 address.
aws365.shop → 13.233.45.120 - AAAA: same thing for IPv6.
- CNAME: an alias from one name to another name, e.g.
app.aws365.shop → my-alb-123.ap-south-1.elb.amazonaws.com. You can’t put a CNAME on the root domain itself. In Route 53 you use an Alias record for that. - NS: which name servers are authoritative for the domain.
- SOA: admin details for the zone. Route 53 creates it for you; you rarely touch it.
- TXT: free text, mostly used for proving you own the domain (Google, email SPF, and Let’s Encrypt, which we’ll use below).
TTL, the thing that makes DNS feel “slow”
Every record has a TTL (time to live) in seconds. It tells resolvers how long they can cache the answer. With a TTL of 86400, a resolver can keep serving the old IP for a full day after you change it. That’s where the “DNS takes 24–48 hours to propagate” line comes from. It’s caching, not magic.
My habit: before migrating anything, drop the TTL to 60–300 seconds a day early. After the move is stable, raise it again.
Step 1: Buy the domain (without the add-ons)
I used GoDaddy in the video, but Namecheap, Hostinger or Route 53’s own registrar all work the same way. At checkout, registrars push a lot of extras: email plans, “premium DNS”, website builders, SSL certificates. You don’t need any of them for this setup. DNS will be on Route 53 and SSL will come free from Let’s Encrypt. Just buy the domain itself, and check the renewal price, not only the first-year offer.
Step 2: Create a public hosted zone in Route 53
For my demo domain aws365.shop, in the AWS console, go to Route 53 → Hosted zones → Create hosted zone:
- Domain name:
aws365.shop - Type: Public hosted zone
Route 53 creates two records straight away: an SOA and an NS record with four name servers that look like ns-123.awsdns-45.com. Copy those four values.
A hosted zone costs $0.50 per month, plus a very small charge per million queries. For a personal site that’s basically the whole bill.
Step 3: Point the registrar at Route 53
Now go back to the registrar, open the domain’s DNS or nameserver settings, choose “custom name servers”, and replace the defaults with the four Route 53 name servers.
This is the step that moves control. From now on, records you create in Route 53 are what the world sees, and records at the registrar are ignored. It usually takes effect within an hour, sometimes longer. Check it with:
dig NS aws365.shop +shortWhen you see the awsdns name servers in the answer, you’re done with the registrar.
Step 4: Create A records for the server
My app is running on an EC2 instance with Nginx in front. In the hosted zone, create two records:
- Record name empty (root domain), type A, value = the EC2 public IP
- Record name
www, type A, value = the same IP
Use an Elastic IP on the instance. A normal public IP changes when you stop and start the instance, and then your domain points at somebody else’s server.
Test it:
dig aws365.shop +short
curl -I http://aws365.shop
If you get the IP back and Nginx answers, DNS is working. The browser will show “Not secure”, which is what we fix next.
Step 5: Free wildcard SSL with Certbot and Let’s Encrypt
Install Certbot on the server (Ubuntu shown here):
sudo apt update
sudo apt install -y certbot
I wanted one certificate that covers the root domain and any subdomain (*.aws365.shop), so I don’t have to issue a new certificate every time I add api. or grafana.. Let’s Encrypt only issues wildcard certificates through the DNS challenge, where you prove ownership by creating a TXT record.
sudo certbot certonly --manual --preferred-challenges dns \
  -d aws365.shop -d '*.aws365.shop'
Certbot pauses and shows something like:
Please deploy a DNS TXT record under the name:
_acme-challenge.aws365.shop
with the following value:
gfj9Xq...Rg85nM
In Route 53, create a TXT record named _acme-challenge with that value (in quotes). Because we asked for two names, Certbot will usually give you two values for the same record name. Put both values in the same TXT record, one per line. Don’t overwrite the first one.
Before pressing Enter in Certbot, confirm the record is visible:
dig TXT _acme-challenge.aws365.shop +shortOnce both values show up, continue. Certbot saves the certificate here:
/etc/letsencrypt/live/aws365.shop/fullchain.pem
/etc/letsencrypt/live/aws365.shop/privkey.pem
One thing people miss: certificates issued with --manual do not renew automatically, and Let’s Encrypt certificates last 90 days. For a set-and-forget setup, use the Route 53 DNS plugin instead. It creates and deletes the TXT records for you using an IAM role on the instance:
sudo apt install -y python3-certbot-dns-route53
sudo certbot certonly --dns-route53 -d aws365.shop -d '*.aws365.shop'
sudo certbot renew --dry-run
The IAM role needs route53:ListHostedZones, route53:GetChange and route53:ChangeResourceRecordSets on your hosted zone.
Step 6: Configure Nginx for HTTPS
On Ubuntu, site configs live in /etc/nginx/sites-available/ and are switched on with a symlink in sites-enabled/. Here’s the config I use:
sudo nano /etc/nginx/sites-available/aws365.shop# Redirect all HTTP traffic to HTTPS
server {
listen 80;
listen [::]:80;
server_name aws365.shop www.aws365.shop;
return 301 https://$host$request_uri;
}
# HTTPS server
server {
listen 443 ssl;
listen [::]:443 ssl;
server_name aws365.shop www.aws365.shop;
ssl_certificate /etc/letsencrypt/live/aws365.shop/fullchain.pem;
ssl_certificate_key /etc/letsencrypt/live/aws365.shop/privkey.pem;
ssl_protocols TLSv1.2 TLSv1.3;
location / {
proxy_pass http://127.0.0.1:3000; # your app
proxy_set_header Host $host;
proxy_set_header X-Real-IP $remote_addr;
proxy_set_header X-Forwarded-For $proxy_add_x_forwarded_for;
proxy_set_header X-Forwarded-Proto $scheme;
}
}If you’re serving static files instead of proxying to an app, replace the location block with a root /var/www/html; line.
Enable it, test the syntax, and reload:
sudo ln -s /etc/nginx/sites-available/aws365.shop /etc/nginx/sites-enabled/
sudo nginx -t
sudo systemctl reload nginx
Always run nginx -t first. If there’s a typo, it tells you the exact line, and your running site stays up. Skip it and restart blindly, and a typo takes the whole site down.
Also make sure the EC2 security group allows port 443. I’ve lost time on this more than once. Everything is correct on the server and the browser just times out.
Step 7: Check it
- Open
http://aws365.shop. It should jump tohttps://on its own. - Click the padlock and check the certificate covers
aws365.shopand*.aws365.shop. - From the terminal:
curl -I https://aws365.shopshould return200(or your app’s normal status).
When it doesn’t work
- Domain doesn’t resolve: run
dig NS aws365.shop. If you still see the registrar’s name servers, step 3 hasn’t taken effect yet. - Old IP keeps coming back: that’s TTL caching. Wait, or test against Google’s resolver directly:
dig @8.8.8.8 aws365.shop. - Certbot says the TXT record is wrong: you pressed Enter too early, or the second value overwrote the first.
- HTTPS times out but HTTP works: port 443 isn’t open in the security group.
- Nginx won’t start:
sudo nginx -tandsudo journalctl -u nginxwill tell you why.
Wrapping up
That’s the full path from “I bought a domain” to a working HTTPS site: DNS on Route 53, a free wildcard certificate, and Nginx doing the redirect and TLS. Once you’ve done it once by hand, you’ll see the same pieces everywhere, behind load balancers, CloudFront and Kubernetes ingress.
If you’d rather put a load balancer in front and use AWS’s own certificates, I cover that in Deploy WordPress on AWS EC2 with ALB, Route 53 & SSL. And if CIDR and IP addressing still feel fuzzy, start with IP Addressing Fundamentals Explained.
Watch the full walkthrough on my YouTube channel, Madhukar Reddy (@awsandevops).

Related articles
 AWS
Deploy Robot Shop on AWS EC2 – Part 3: RabbitMQ, Payment & Dispatch (Real-World Troubleshooting)
The final part of the Robot Shop series: deploy RabbitMQ, the Python Payment service and the Go Dispatch service, fix a missing Shipping variable, and watch orders queue and drain in RabbitMQ.
 AWS
Deploy Robot Shop on AWS EC2 – Part 2: Redis, User, Cart, MySQL & Shipping (Fixing Real Connection Failures)
Part 2 of the Robot Shop series: deploy Redis, the User and Cart services, MySQL and the Java Shipping service on EC2, and troubleshoot the real connection failures along the way.
 AWS
Deploy Robot Shop Microservices on AWS EC2 – Part 1: MongoDB, Catalogue & Nginx Frontend
Part 1 of the Robot Shop series: understand microservices, then deploy MongoDB, the Node.js Catalogue service with systemd, and the Nginx web frontend on separate EC2 instances.